Thursday, April 30, 2015

My Monthly Complexion Revival Facial Mask Deep Cleans and Encourages Cell Renewal

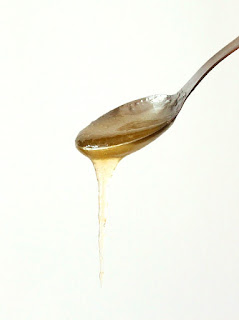
spoonful of honey.jpeg
Honey has amazing properties when it comes to skin.


This facial mask is one I use monthly for a thorough deep cleaning to unclog what still may remain trapped in my pores from makeup and products as well as providing a healthy renewal to the complexion with all the protein, a storehouse of B vitamins, and minerals from brewer’s yeast and plain yogurt. At the same time, it heals and gently moisturizes the skin in a beautiful way from honey.  It will not take your wrinkles away, but it does brighten and give the face somewhat of a lift.

As you know, I have shared my other homemade skin care recipes with you because I believe firmly in the power of natural ingredients when it comes to seeing complexion results.  This is another recipe that is simple but quite effective for improving the look of your skin.  I do hope you try it because it does not disappoint!

Look in my right sidebar in the labels section and scroll down to homemade skin care recipes.  There you will find other wonderful recipes that I have tried that have done nice things for my skin–and they will do the same for you, too.


My Monthly Complexion Revival Facial Mask

1-1/2 teaspoons of powdered brewer’s yeast
1 tablespoon of plain yogurt
½ teaspoon of honey


Mix the three ingredients together and apply to your clean face and neck.  

You will want to go stretch out and get comfortable on your bed because you want to keep this mask on for about 25-30 minutes.  After all, you deserve a break and some “me” time to energize.

When the time is up, rinse the mask off with tepid and then cool water before drying.

This mask will not only make your face bloom with new vitality but also make you smile because your skin will look amazing.                     

Wednesday, April 29, 2015

Review: L’Occitane en Provence’s Second L’OcciBox for Spring, 2015 Is Here!

**Disclaimer:  This post has been compensated through a free product (s) or monetary payment.  Opinions are solely mine. All links are "no-follow" links.**

 L’Occitane en Provence’s Second L’OcciBox for Spring, 2015. jpeg
This is L'Occitane's Second L'OcciBox.  It does makes a beautiful gift.  

L’Occitane en Provence got into the beauty sampling program back in December with a seasonal box. This Spring I received the second L’OcciBox, full of their best-selling products and one from a special partner.


Besides an excellent way to test out some great beauty before you buy full-size products is the fact that you can buy by the box instead of being tied to an annual subscription.  The cost is $20, but the box has a $50 value. 

Just look at the contents of this second L’OcciBox for Spring, 2015.


L'Occitane's Second L'OcciBox for Spring 2015.jpeg
L'Occitane's Second L'OcciBox for Spring 2015


1.  Shea Whipped Hand Cream (30ml) – Another favorite hand cream of mine with 25% shea butter with a lighter texture.  

2.  Shea Butter Hand Cream (10ml) – This is an amazing, hardworking formula with 20% shea butter that I use all the time.  It doesn’t leave hands greasy, but soothes irritation quickly to leave softness behind.

3.  Jasmin & Bergamote Eau de Toilette (1.2ml) – This is a lovely fruity-floral where jasmine is the star set off with freshness from bergamot.  

4.  Immortelle Brightening Essence Sample (1ml) – This immortelle flower formula is for evening out complexion tone and brightening.

5.  Immortelle Precious Serum (7ml) – This anti-aging serum has the immortelle flower for its restorative powers in help with lines and wrinkles. 

6.  Bone Mere Rose Soap (3.5oz.) – This gentle formula with palm oil cleans without stripping skin’s natural oils as it scents with romantic rose.  

7.  1 cube of Sugarfina Champagne Bears (3.3oz.) – This luxury candy is inflused with classic Brut and Rose champagne! 
You can buy these limited boxes online or at L’Occitane’s boutiques, but you need to hurry if you want to take advantage of this deal.  Enter coupon code, SUGAR, at checkout to get that $20 price.

Tuesday, April 28, 2015

Are You Properly Caring for the Skin of Your Eye Area Or Unknowingly Causing Damage?


eye.jpeg
The eye area is prone to premature aging so the earlier you to protect it, the younger you will look.


Since our eyes are one of the first places others gravitate to, we need to take extra precautions on delaying that advancement of time as much as we can.  Otherwise, we could be making the aging problem much worse unless making a few simple changes to properly care for that delicate area.  

Considering how thin the skin of the eye area is at approximately 1/32 inch in thickness, you need to remember how easily that skin can be stretched.  Therefore, you need to minimize the amount of accumulative damage that results every time you tug or rub that area from how you apply eye cosmetics to allergies. 
Instead, you might want to rethink your tube concealer and replace with a smoother liquid or cream.  Patting this product or any eye cream lightly in with your ringer finger will use less pressure than forcing a heavier formulation.  

Allergies can come from practically anything, but if you suddenly developed symptoms that coincide with any new shampoo, conditioner, face cream, or eye cream, then try putting it aside for a few days to see if your condition improves.  

Natural skin care creams and eye products may be missing complicated chemical ingredients but may use plant extracts that also may trigger allergies in sensitive individuals.  Keep this in mind.

Switching to a different product could be all you need to stop any eye irritation and keep your hands away. You can always try over the counter antihistamines to help with itching  and watery eyes from allergies as well.

Limiting that excess stretching of the skin is very important, but so is the type of eye cream you use.  Instead of a heavy, rich formula of eye gel or eye cream that you may think will work more effectively for anti-aging, you should look for a lightweight lotion that won’t end up trapped under the eye.  

Daily applications of these heavy eye creams are unable to break down and build up deposits.  Once set, those deposits can add to the look of bagging under the eyes. What you might not be aware of is that a majority of women wanting “eye lifts” or blepharoplasty operations result because of heavyweight eye creams over the years. 

Monday, April 27, 2015

Review: NEW Iris Bleu & Iris Blanc Eau de Toilette, Body Milk, and Perfumed Soap From L’Occitane en Provence–Fresh Floral Extraordinaire!

**Disclaimer:  This post has been compensated through a free product (s) or monetary payment.  Opinions are solely mine. All links are "no-follow" links.**
L'Occitane's Iris Blue & Iris Blanc Eau de Toilette, Body Milk and Soap.jpeg
Iris Bleu & Iris Blanc Body Milk, Eau de Toilette, and Perfumed Soap from L'Occitane en Provence.


Just in time for Mother’s Day, I am happy to tell you that L’Occitane en Provence added another fragrance for women to their La Collection de Grasse.  Iris Bleu & Iris Blanc Eau de Toilette is their new fresh fruity-floral offering that is a sensory experience of feminine beauty.

This fragrance opens with a sparkling spirit from juicy top notes of invigorating citruses and black currant. Though pronounced, this composition is carefully orchestrated because once those notes further warm in the floral heart with iris and ylang-ylang along with peach and fig milk, it loses that stronger crispness and mellows. The result is an intriguing mix of fresh verus powdery notes that embody its radiant personality. As it dries down, the base notes of cedar and white musk softly entice and seduce.


Iris Bleu & Iris Blanc Eau de Toilette, unboxed, jpeg
Iris Bleu & Iris Blanc from L'Occitane en Provence, unboxed

The Iris Bleu & Iris Blanc Perfumed Body Milk ($27) is a pampering way to compliment the Eau de Toilette ($78) with that lovely scent.  This pink lotion is just what you need to richly moisturize the skin and keep that fragrance going even longer. 

The Iris Bleu & Iris Blanc Perfumed Soap ($7) is a joyous luxury as well.  The fragrance seems to linger after washing with this gentle soap.

You may want to look into L’Occitane en Provence’s Iris Bleu & Iris Blanc products this year for gift giving for both your mother and yourself because you both deserve this sweet combo of fruits and flowers!

Sunday, April 26, 2015

ENJOY Hair Care Shaping Lotion, Nourishing and Moisturizing Oil and Hair Spray Review + ($66) Giveaway!–Ends May 13, 2015

Disclaimer:  This post is based on a free product provided by a company as a press sample so that I may offer my own  opinion, which may be the same or differ from yours.
ENJOY Shaping Lotion.jpeg
ENJOY Shaping Lotion


Warm weather is the time you might want more of a carefree hairstyle.  If so, you probably need to switch some hairstyling products along to suit the style as well as the conditioner for your hair. With ENJOY Hair Care’s Shaping Lotion, Nourishing and Moisturizing Oil, and Hair Spray that I have been using, I could have found your answer as well for summer hair maintenance.

As you know, I have some natural curl to my hair, which lets me go from curly styles to straighter ones just by adapting the products and using my diffuser. As one that never tried ENJOY’s Shaping Lotion ($23), I thought this product just might come in handy when you want the least amount of fuss for giving some soft control.  

By the time I finished drying my hair, I had more fuller curls through my layers that were soft and shiny without feeling tacky to the touch.  My curls had movement but they weren’t all over the place or frizzing out on me even though it was raining when I tried it.


ENJOY Nourishing & Moisturizing Oil.jpeg
ENJOY Nourishing & Moisturizing Oil


Though it is not summer yet, the more time I like to spend outdoors to soak up the sun, which can dry and damage the hair.  To prepare in advance, I thought testing ENJOY’s Nourishing and Moisturizing Oil ($24.95) on my hair now was in order since it could use a bit of help. This product has natural oils, antioxidants and fortifying vitamins like sesame, avocado, coconut, macadamia, evening primrose, safflower, and grape seed oils to deeply moisturize and condition along with vitamins E, A, B, and D.

This leave-in conditioning spray did a great job restoring gloss and softer feel to my hair.  You can also use this oil on the face, which I didn’t try yet.  I will do that once I finish my current skin care testing.

I also tried ENJOY’s Hair Spray ($18).  This has a firm, but flexible hold that kept my hair in place without hardening it like I had on a hard hat.  It also dried fairly fast and went back to shape after taking my brush to it later. 


ENJOY Hair Spray.jpeg
ENJOY Hair Spray

With ENJOY Hair Care’s Shaping Lotion, Nourishing and Moisturizing Oil, and Hair Spray, I am prepared for some sun and fun.  If you’re not ready, then I suggest stopping at ENJOY Hair Care’s website and check these products out!

*Disclaimer:  Free products were provided to facilitate this review--not my opinion.*

Thanks to ENJOY Hair Care, one lucky Nuts 4 Stuff reader in the continental United States wins ENJOY's Shaping Lotion, Nourishing and Moisturizing Oil, and Hair Spray ($66 value)!


Giveaway details and how to enter–


Prize: One (1) winner will receive the ENJOY Hair Care Shaping Lotion, Nourishing and Moisturizing Oil, and Hair Spray ($66 value)!

Dates of entry: 04/26/15–05/12/15 at 11:59 PM Eastern Standard Time

Eligibility: Open to addresses in the continental United States.  No PO Boxes.  The winner will need to respond to my email with name and shipping address within 48-hours or another winner will be picked.  

How to Enter:  Please use the Rafflecopter widget if it works.  You can also enter by clicking this link or try to enter using another browser. You can return daily and log in again with your email to tweet or to vote for Nuts 4 Stuff daily on Picket Fence Blogs.


a Rafflecopter giveaway

Saturday, April 25, 2015

A Dentist Recommended Solution for Cleaning Your Dog’s Teeth!


angry dog showing teeth.jpeg
This guy doesn't want that doggie toothpaste shoved in his mouth judging by his expression.  Why would he when he has a tastier option for cleaning? 


Yesterday it was time again to go to the dentist.  This time, however, it was nothing scary but a routine cleaning.  While I was there, I learned something from the dental hygienist that I thought you might be interested in learning.

The hygienist told me how my dentist regularly buys bagels for everyone at the office.  When there are leftover bagels, he takes them home and cuts them into small bite size pieces, wraps them up and freezes them for his dog.  Instead of giving his dog one of those commercial chew bones, he just reaches into the freezer and gives the animal a piece of frozen bagel.  This is what he says works better to clean his dog’s teeth than what he was buying for the same purpose.

The hygienist told me everyone at the practice that has a dog was supplied with bagels for their dog courtesy of my nice dentist.  In fact, she said those with dogs thought the frozen bagel method gave them cleaner looking teeth as well.

If you have a dog, I hope you try this sometime on your animal and let me know what you think.  

Friday, April 24, 2015

You’ll LOVE This Dermatologist Recommended Way to Gently Exfoliate But Deep Clean!


Baking Soda.jpeg
Baking soda can make a beautiful difference in how you exfoliate.


Longwearing foundations and skin care products with silicone-based ingredients can take a toll on our complexion if not properly removed.  They can embed themselves so deeply into your pores even after cleansing.  Therefore, if you don’t want those ingredients to linger and eventually break down a bit of your own skin’s collagen, then you need to exfoliate weekly.    

In fact, you definitely need to try this simple fix.  Mix one half teaspoon of baking soda and one half teaspoon of a water-based cleanser as well as a little warm water together to clean your face with. 

Facial peels are also very helpful when used with care.  Just remember, it is important not to let yourself get carried away and overdo.

Thursday, April 23, 2015

How to Prepare for a Facial to Get Better Complexion Results

woman-getting-facial.jpeg
This post will make your facial work harder.


You may believe washing your face first with a mild soap or a gentle cleanser is enough to get your skin ready for a facial, but it is just the first step. If you intend to harvest the most beauty power out of that treatment, you need to do a bit more first to prepare the skin. Afterwards, you will be surprised at the difference in your complexion in how your skin responds to those beneficial ingredients.

Just as important to that initial cleansing, you have to follow up with an astringent or your toner. This will additionally clean any remaining soap, cleansing residue, or dead skin that had lingered.

Now is the time that your skin is ready to receive the nourishment from your facial mask.  Depending on your complexion issues, there are a variety of wonderful facial masks among my homemade skin care recipes that you may want to try or select the commercial product of your choice.

After you apply the mask, you need to relax with it on for about a half hour.  This bit of “me time” can help smooth the lines caused by tense muscles and revive the face along with the wonders of the ingredients.  

The water temperature of how you rinse your facial mask off is also crucial.  Be sure to use tepid water only because you want to keep your pores open.  Hot water will strip the skin of too much of your remaining natural oil while cold will close the pores.  Keep this in mind.

At this stage, your clean face is ready to receive even deeper cleaning of your pores with steam.  You don’t need any fancy equipment.  All it takes for this home treatment is a pot with boiling water, a towel to tent over that pot, and the right herb to help what your complexion needs.  For example, rosemary is wonderful to steam a dry face with.  On the other hand, chamomile is better for those with normal skin.  Those with oily skin might find peppermint useful.

Other than seeking out the services of a professional, your pores are as clean as you can get them at home.  However, you need to close them the proper way.  Start by rinsing your face with warm water (not hot) and gradually change over to splashing with cold water.  

The final step is remembering to moisturize and allowing the product time to soak in. 

Afterwards, you will see a great complexion and feel better about your appearance than before.

Wednesday, April 22, 2015

Review: IT Cosmetics CC+ Radiance Vitality Brightening Creme Disc and Airbrush Creme Brush

**Disclaimer:  This post has been compensated through a free product (s) or monetary payment.  Opinions are solely mine. All links are "no-follow" links.**

IT Cosmetics CC+ Radiance Vitality Brightening Creme Disc.jpeg
IT Cosmetics CC+ Vitality Brightening Creme Disc 


I couldn’t imagine IT Cosmetics topping their Vitality Brightening Anti-Aging Face Disc when they developed a cream form with their CC+ Radiance Vitality Brightening Creme Disc, but I have to admit my new found obsession with this giant compact for delivering an even more natural, dewy look to my dry skin than you might expect from makeup.

Inside this compact that is enriched with anti-aging ingredients such as hydrolyzed collagen, hyaluronic acid, peptides, acai, antioxidants, and green tea, to treat as well as color, is a gorgeous natural pink color correcting anti-aging creme blush, a creme matte bronzer in a light tan, and Hello Light Creme Illuminator.


IT Cosmetics Airbrush Creme Brush.jpeg
IT Cosmetics Airbrush Creme Brush has uniquely spaced hairs to its angled design that helps performance.

When you take the Airbrush Creme Brush to this compact, its design is made specifically to pick up not as much product than some of your other brushes so it can leave your face with more of an airbrushed finish.  I did have my foundation, concealer, mascara, shadow, and liner already on before I began.

What worked the best for me was starting with the creamy illuminator this time to keep the brush from building up too much color then following with the bronzer and blush. This saved me from getting any of the darker shades in areas that needed highlighting.  The effect was pure beaming light without any glitter or shimmer pouring onto the skin.

I followed Jamie Kern’s chart on the back of the box and applied in the middle of my forehead, the top of brows, the corners of eyes, under the eyes, the top of the cheekbones, the center of the nose, my cupid’s bow, and to the center of the chin. 

Usually I contour first when using my normal brushes, but I did my contouring next.  I do have a fair complexion with yellow undertones.  In the compact, this tan shade looked a bit dark but that brush caught just enough to warm up my skin not overpower it with too much of a tan color.  If you’re darker, you just may need to apply more but for my skin, I was happy with less than more.

As to the pink creme blush, it promises instant health with a shade of pink that is so flattering for practically all skin tones.  

The magic of this compact is how once everything is blended, it has the power to brighten and color the face with a realistic sort of healthy glow that is as close to natural beauty.  This product also can look fresh for many hours of wear without diminishing. Perhaps, those with oily complexions may have different results, but this is my experience as one with dry skin.

My advice is check IT Cosmetics CC+ Radiance Vitality Brightening Creme Disc and the Airbrush Creme Brush, especially if your skin is dry because this is something you got to try.  You can also find these products on Ulta and QVC.com. 


Sunday, April 19, 2015

The Most Flattering Nail Look for Aging Hands

Squoval nails shape.jpeg
This is my attempt at the "squoval" shape.

No one likes to think about aging, but it does happen to all of us sooner or later.  Not only do we have different facial concerns, but also the condition of our nails can change.  They may tend toward weakness, peeling, gain ridges, and discolor to require a strengthening treatment.

If this describes you, then you might be better off trying to work around the issue to best suit your needs instead of trying to follow the pack.  The outcome may pleasantly surprise you with how much younger your hands may look.

Instead of the square-shaped nail, I suggest altering it into a “squoval” shape.  By this, I mean that shape is not entirely square or purely oval but in between.  The look is more classic and chic.

Another recommendation is rethinking the length of your nails.  You may have kept them long just a few years earlier, but you should consider adapting to a shorter length beyond your fingertips.  This will further help protect them from breaking but also give your nails a timeless, graceful look.

Just as important to aging hands is the color you paint your nails.  Though wild, shocking colors of nail polish can be fun, you might want to save those shades for your toes and switch to pale, sheerer shades such as light pink or beige.  The reason is light colors seem to lengthen the look of the nail compared to bright shades that can make the nails appear shorter.

Saturday, April 18, 2015

Recipe: Try My Sloppy People Sandwiches for a Lazy Weekend Dinner!

Try My Sloppy People Sandwich closed.jpeg
My Sloppy People Sandwich on a homemade bun!


For those times that you want something fast that requires minimum effort, I like to make my take on Sloppy Joe sandwiches.  At our house, we renamed them Sloppy People Sandwiches because though delicious with ground turkey, vegetables swimming in a seasoned tomato sauce, they are messy to eat.  Still, they are so tasty and save time when you want to free up your day.

Sloppy People Sandwiches

1 medium onion, chopped fine
½ cup chopped green pepper
1/4 cup chopped jalapeno pepper
1/4 cup chopped celery
3 tablespoons of canola oil or olive oil
1 lb. of ground turkey or ground beef
1 cup of catsup
1 tablespoon of vinegar
½ teaspoon of Worcestershire Sauce
1 tablespoon of sugar
1 teaspoon of salt
1/4 teaspoon of black pepper
1 teaspoon of mustard

Brown the onion and other vegetables to cook till tender before adding the ground turkey or beef.  Drain off the fat if necessary.

Stir in the remaining ingredients to the meat and vegetable mixture with the catsup, vinegar, Worcestershire, sugar, salt, pepper, and  mustard and cook through.

Serve on big buns. 


My Sloppy People Sandwich open.jpeg
My Sloppy People Sandwich

ENJOY!

Thursday, April 16, 2015

Review + SWATCHES: Rimmel London Provocalips 16 Hour Kiss Proof Lip Color (Heart Breaker, Kiss Fatal, and Playing With Fire)

**Disclaimer:  This post has been compensated through a free product (s) or monetary payment.  Opinions are solely mine. All links are "no-follow" links.**

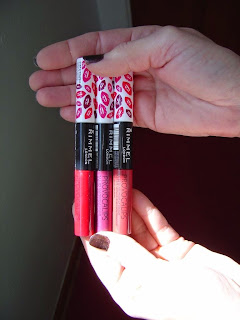
Rimmel Provocalips Rimmel Provocalips 16 Hour Kiss Proof Lip Color trio.jpeg
From left to right is Rimmel Provocalips Playing With Fire, Kiss Fatal, and ending with Heart Breaker.


I love long-wearing lip colors as much as the next woman, but you have to admit they can be a bit drying. However, Rimmel London came out this Spring 2015 with their Provocalips 16 Hour Kiss Proof Lip Color and I needed to see if this new line lived up to its claims.  I was sent several to review in 750 Heart Breaker (brick red), 550 Playing With Fire (true neutral red), and 230 Kiss Fatal (mauve-plum).  

This is a two-step lip product with one clear gloss side and the other with the lip color.  When I first pulled out the lip color with its doe-foot applicator, it was a bit thinner consistency that reminded me of a liquid lipstick.  


Rimmel London Provocalips 16 Hour Kiss Proof Lip Color Heart Breaker.jpeg
Rimmel London Provocalips Lip Color in Heart Breaker

The product went on smoothly and dried fairly quickly.  You do need to give it a minute to set before turning that tube upside down and using that clear coat of gloss.  This is what kept my lips feeling comfortable and moist instead of dry as this type of stain product can be. 


Rimmel London Provocalips 16 Hour Kiss Proof Lip Color Clear side.jpeg
Rimmel London Provocalips the clear side of Playing With Fire

Provocalips did last exceptionally longer than you might expect through eating and drinking without transferring to my coffee cup to kissing.  Some of the color does disappear to become more of a stain.  I had enough color after a meal without touching up.  All I did was add the clear end for more of a shine. In fact, the same thing happened after dinner because there was sufficient color still left.


Rimmel London Provocalips 16 Hour Kiss Proof Lip Color Kiss Fatal.jpeg
Rimmel London Provocalips Lip Color in Kiss Fatal

I really loved this product because it does live up to its promises.  Although I didn’t clock it to the minute, this lippie won’t budge unless you take an oil-based remover to it.  If you don’t, you will see still have traces of it the next day.


Rimmel London Provocalips 16 Hour Kiss Proof Lip Color in Playing With Fire.jpeg
Rimmel London Provocalips Playing With Fire


Do look for Rimmel London's Provocalips 16 Hour Kiss Proof Lip Color  because it is something want to have in your beauty stash.

Disclaimer:  Free products were provided to facilitate this review--not my opinion.*

Tuesday, April 14, 2015

Review: Sally Hansen Miracle Gel Nail Polish (Mad Women, Spice Age, Too Haute) & Top Coat + SWATCHES!

Disclaimer:  This post is based on a free product provided by a company as a press sample so that I may offer my own  opinion, which may be the same or differ from yours.
Sally Hansen Miracle Gel 560 Spice Age Nail Polish.jpeg
This is Sally Hansen Miracle Gel 560 Spice Age.

A great way to give your image a boost is with a gorgeous shade of new lipstick or nail polish.  With Sally Hansen’s Miracle Gel Nail Polishes that I received, you are sure to find the colors to do just that among the tempting 47 polishes.  I got 520 Too Haute (violet-pink), 560 Spice Age (ginger-brown), 500 Mad Women (pink-fuchsia), and 100 Top Coat.  

These new polishes do have a nice size brush that made application fairly easy.

Sally Hansen Miracle Gel 500 Mad Women Nail Polish.jpeg
Sally Hansen Miracle Gel 500 Mad Women

For this review, I started by using one coat to paint my nails.   However, I do recommend two coats because the color can show through.  Nonetheless, I like to see how heavy the coverage when I first try new polish.  

I did follow the first coat with the 100 Top Coat.  It did not last nearly a week so I started again.  This time I gave myself two coats before adding the Top Coat.  What a difference that made in extending the wear of this polish.  I got 12 days of beautiful looking nails!

I do think 500 Mad Women or 520 Too Haute were my favorites to compliment my skin tone.  
I really liked not worrying about chipping with that extra time that I got.  If you are tired of painting your nails every other day, then do check these polishes out because this will solve that for you.

Have you tried any of Sally Hansen's Miracle Gel Nail Polishes yet?  Any favorite colors you recommend please share here.  
  
Sally Hansen Miracle Gel Top Coat and 520 Too Haute.jpeg
On the left is Sally Hansen Miracle Gel Top Coat with 520 Too Haute on the right.

Sally Hansen Miracle Gel 520 Too Haute Swatch.jpeg
Here I'm modeling Sally Hansen Miracle Gel 520 Too Haute.  This looks so striking even with jeans.  The color appears quite violet in the jar but once on the hands transforms into this unbelievable deep pink-violet.
Sally Hansen Miracle Gel 560 Spice Age swatch.jpeg
Here I have on Sally Hansen Miracle Gel 560 Spice Age, a dramatic brown.

Sally Hansen Miracle Gel 500 Mad Women swatch.jpeg
I thought Sally Hansen Miracle Gel 500 Mad Women was a flattering shade as well.  What do you think?
Disclaimer:  Free products were provided to facilitate this review--not my opinion.*

Monday, April 13, 2015

The Secret of Better Controlling Naturally, Curly Hair

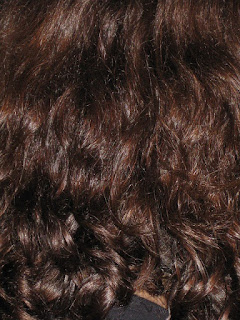
Curly Hair back of head.jpeg
Forget the frizz and replace it with beautiful, tamed curls!


Anyone born with curls or waves knows it comes with a price–-called unruliness and frizz.  In order to keep the hair shiny and manageable a daily leave-in product specially formulated for naturally curly hair is a must. However, if you have been using this product without much success, then you have been making your selection the wrong way.

Instead, look for one specifically meant for your hair’s thickness, texture, and curl type when you are about to make a new purchase for a daily leave-in product.

The results of the various formulations can be amazing once you have the right product.  For example, fine and soft, silky hair does best with a leave-in serum over a heavier gel or cream product.  The serum will seal the cuticle and strengthen the curls with more beauty without weighing it down.

On the other hand, thick or coarser textures need a heavier duty leave-in product like that gels and creams to adequately tame this hair type of frizz.

Sunday, April 12, 2015

Recipe: My Peanut Butter-Spice Layer Cake Is a Sweet Temptation You Won’t Be Able to Resist!


If you like a great simple cake, prepare to get excited.  Today I have the most exotic and delicious peanut butter cake with cloves and cinnamon that you will ever taste that is also easy to make.  Something else to cheer about is my recipe doesn’t call for fancy cake flour and uses plain, all-purpose flour, yet turns out fine-textured and light as a feather.  Top this cake with a fluffy whipped cream type of vanilla icing such as my special occasion bakery frosting and you increase your pleasure factor beyond belief!


My Peanut Butter-Spice Layer Cake, unfrosted.jpeg
This is  what one layer of my Peanut-Butter Spice Layer Cake looks like unfrosted.  


Instead of butter, you can use shortening or margarine as long as it is not labeled spread. Spread has too much water and will work for baking or in the above cooked bakery frosting. The recipe is linked below for you.  

Enough of my rattling on, here is the recipe!  


My Peanut-Butter Spice Layer Cake

2 cups sifted flour
3 teaspoons of baking powder, leveled
½ teaspoon of salt
½ teaspoon of ground cloves
½ teaspoon of ground cinnamon
1 tablespoon of vanilla
½ cup of creamy peanut butter
½ cup or 1 stick of butter or margarine
1-1/2 cups brown sugar, firmly packed (light or dark)
2 large eggs
1 cup of milk

Cream the butter, peanut butter, and sugar thoroughly before beating in the eggs, one at a time.

Sift the flour twice before adding the rest of the dry ingredients of sugar, baking powder, salt, spices in a separate mixing bowl.

Measure out your cup of milk and vanilla next.

Now gradually add some of the flour mixture to the creamed mixture and beat with your electric mixture. Alternate with milk, then continue to add more of the flour mix, beating through until everything is incorporated into your cake batter.

You will need to well grease  two  8"-5/8" x 1 ½“ layer cake pans.  I like to cut out two pieces of wax paper to fit the bottom of each pan.  This makes removing that cake without it coming apart so much easier.

Bake in a 350-degree oven for about 25-30 minutes, depending on how your oven is regulated.  Test with a cake tester, tooth pick or a slender knife to see if anything sticks.

Leave in the pans for at about 10 minutes before attempting to remove.  

Frost with my Special Occasion Bakery Frosting or your favorite frosting.

ENJOY!